It’s been weeks since I last blogged. I’ve been busy. During a recent extended visit at my parents’ house, I tackled a major photo preservation project. I went through about eight photo albums and scanned anything that was one-of-a-kind or damaged. The files created by the scans led to other tasks, such as labeling and organizing.
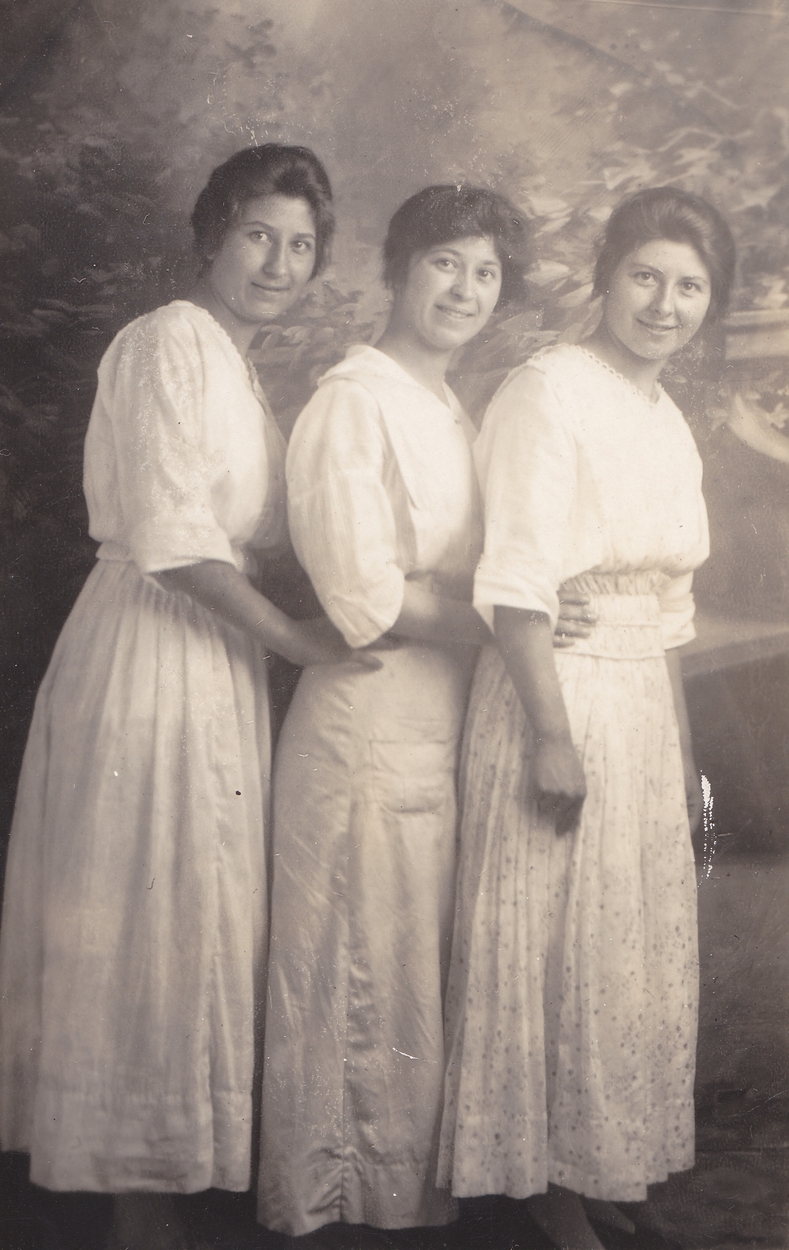
Eva, Alma, and Emelia Carrier, 1914.
Some of the photographs were damaged because they were just old. Some had been taken in and out of frames multiple times over the years and had remnants of various adhesives on the backs and corners. Some of the photographs were sustaining damage because they had been placed in magnetic page albums. I felt that I couldn’t let another year go by without scanning some of these. I wish I had the time to scan everything!
I did bring part of the project home with me, however. My dad’s old cigar box that I replaced a few years ago with an archival one is full of pictures from his childhood, his time in Korea with the Maine State Guard, and from college. In fact, since I finished my master’s degree, during which I did a bit of work on that old, mysterious box, my parents have found twice as many pictures. The project requires more time, more care, and frankly a better scanner than I could muster on vacation. Below, you’ll see how the project is shaping up (I’ll write more on it, later).

All of the photographs from the box have been separated into categories according to place and time. These labels will match the file names on my computer where the scans will be placed.
One tip I would like to suggest is that if there is anything written on the back of your family photos, scan the backs as well. Then, in the digital file, give it a similar name so the items will be consecutive. Ex: GillisMaine1990.jpg, GillisMaine1990back.jpg.
Another thing I discovered was that some of the black and white photographs were so light, the scanner could not differentiate between the image, the white border, and the scanner bed. Below, is my low-tech solution to this problem.
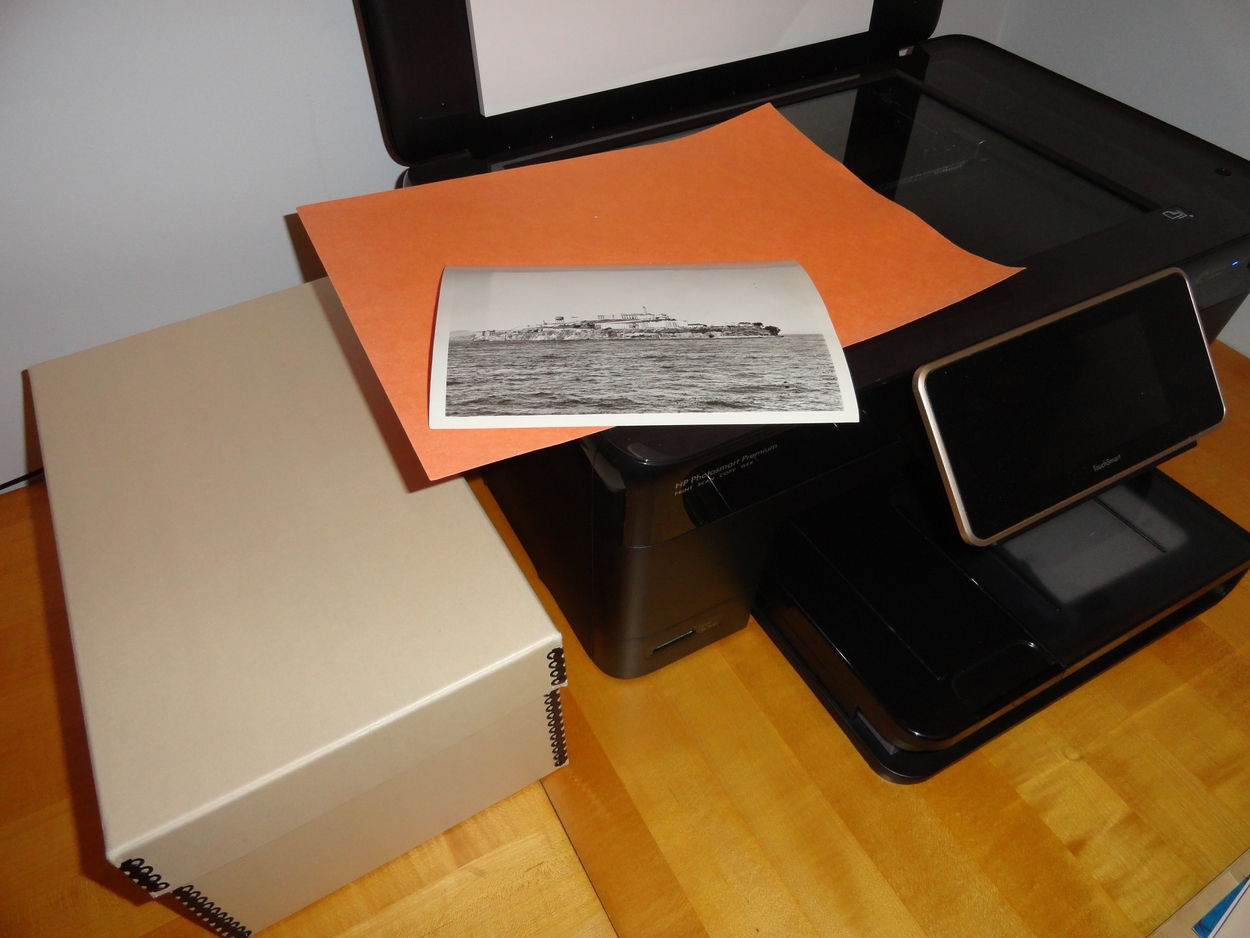
Place the photo face-down on the scanner glass. Put a larger-sized piece of colored paper behind it, then close the lid and scan. This keeps the scanner from surreptitiously cropping the image.
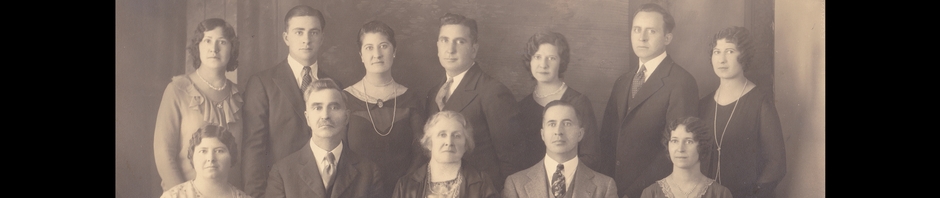
I really felt that I had hit pay dirt when I found the following image. It is the 50th wedding anniversary of my great-grandparents Joseph Camille Carrier and Emelie Poisson. They were married on November 10, 1890 in Plessisville, Megantic, Quebec, Canada.

Back row: Annette, Rowland, Eva, Emile, Yvette, Joseph, and Florence Carrier
Front row: Emelia (my grandmother), Joseph Camille Carrier and Emelie Poisson, Ena, and Alma Carrier, 1940.
There were two other phases to my “scancation.” My mom had a stack of 11″ x 14″ photographs that were taken professionally when my brothers and I were kids. Those were too big for our home scanner. I called around to several places. Kinkos wanted $1.99 a scan and Office Depot was asking $2.99 a scan. I ended up going to Office Depot and using a coupon and paid $1.50 each for 8 photographs. When you scan your oversized photographs, you will probably plan ahead and find a better deal than I did. However, don’t they look great?
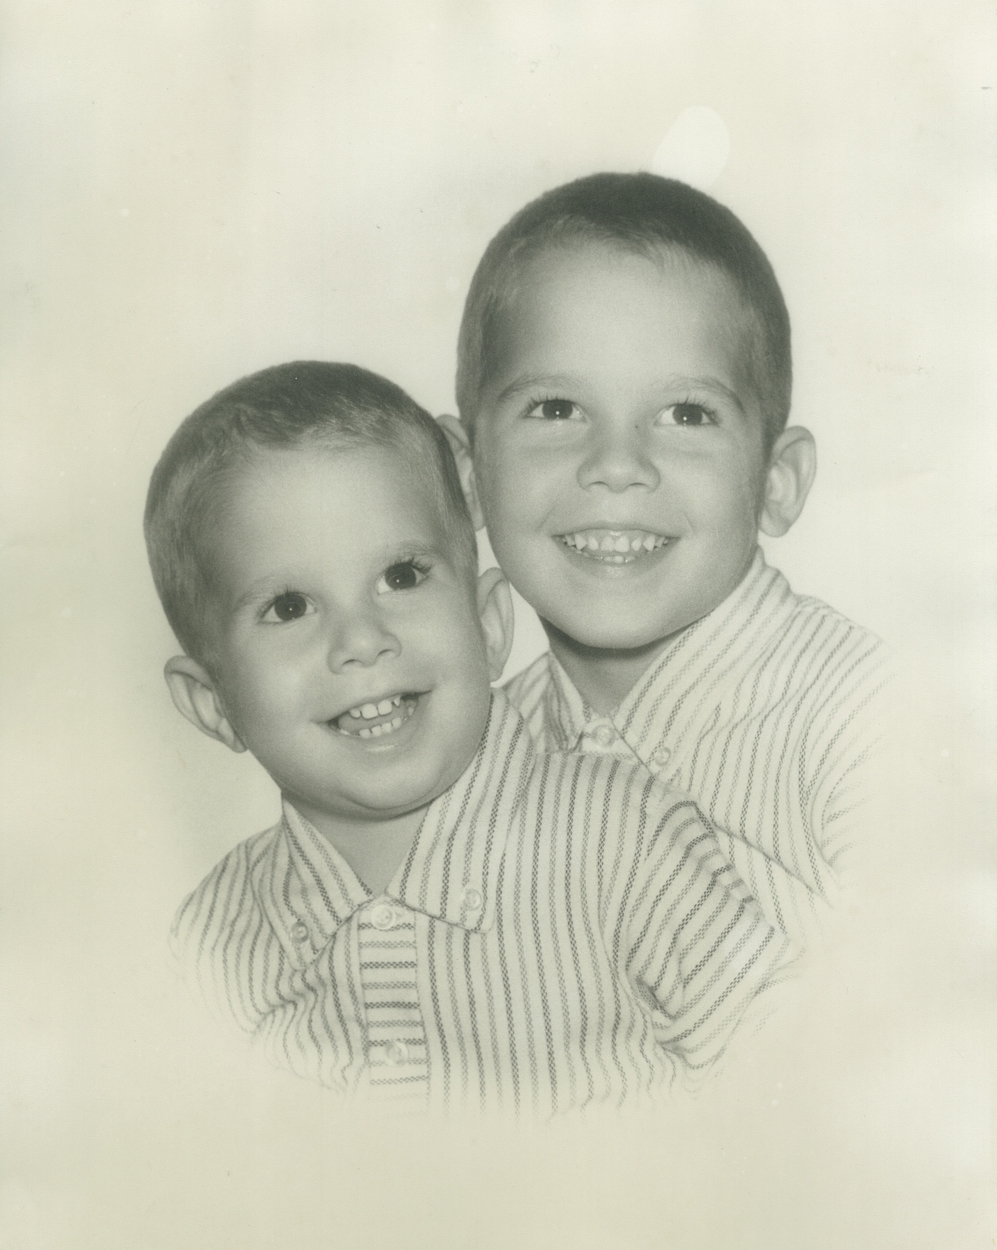
Brothers Kent (age 3) and Kirk (age 6).
The last phase was to take a reel of 8mm home movie film to a firm that will digitize it. We used Discovery Media Productions in Portland, OR. Here is the YouTube video I watched to figure out what kind of film I had and how long it was. Super easy.
My final three tips are as follows: 1. If you are about to buy a scanner for home use, buy the best one that you can afford. Technology is always improving and you don’t want to be disappointed with your efforts 6 months from now and feel you have to re-scan your images. 2. When transferring a photograph from a frame to an album, remove every last bit of adhesive, first. 3. Whether framing or storing photographs, cardboard = BAD.


2 Responses to Genealogy: Scanning